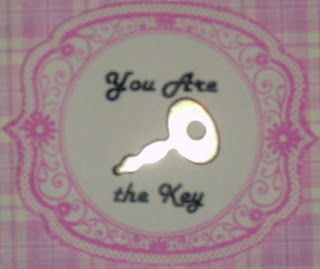
Some of you know me, but others have just met me, so I'll tell you a bit to help you understand the card I made. I teach 1st grade at a public school for a small school district near Portland, OR. The staff at our school is a closely knit bunch and we feel like family. We all work very hard to help our students achieve and succeed. I have been trying to come up with a card to welcome them all back from summer break. When I saw the little gold keys being offered through Paper Wishes, I knew instantly what I wanted to do. I think they will each appreciate this card. I hope you will too.
First, I created a card base by welding two apples shapes together on my Gypsy and cut it out on my Cricut expression. This apple is from the Cricut Sampler cartridge. I used the same image to cut the front layer out of a pink plaid paper, also from Paper Wishes.com. I made the front layer just a wee bit smaller and trimmed the left edge so it would have a very small border around it. The card was cut at a height of 5 inches and the front layer at 4.95 inches. If I were to make this card again, I would use cream or ivory colored cardstock instead of white as the front layer has this color in it and I used ivory for the medallion because it looked better than the white. I already had all 36 cards cut out of white with the front layers adhered so....
I used an ink dauber and VersaMagic gingerbread ink to color the stems both front and inside. I used the side of the dauber at the top of the stem to give it dimension and interest. A blend of light bright green chalk and one a bit darker, both from Pebbles Inc. was used to color the leaf. Again, both inside and out.
For the medallion on the front, I printed the sentiment with my computer and HP printer using Harlow Solid Italic font at size 18. Because my HP ink is not stable and dissolves if it gets wet, I took it to Kinko’s and had it printed on ivory cardstock. Then I stamped an ornate frame around it with Labels & Frames stamp set, also from Paper Wishes.com. I used Paper Craft orchid ink. After trimming close (I cut through the teeny scalloped edge) I added the key and adhered the medallion to the card using foam pieces to give it dimension.
For the inside, I used my imagine. The WELCOME was cut at .6 inch true size from the All Wrapped Up imagine cartridge. The plan was to take individual letters from other sentiments on this cartridge for BACK, but when printed and cut, the K looked too much like an H so I had to punt. I ended up using Blast Off cartridge and printed just the inside layer of the letters cut at .6 inch true size. They are wider then the letters in WELCOME, but I think it looks OK.
Some additional information:
For cards, instead of using expensive 12 X 12 cardstock, I almost always use 8 1/2 X 11 index cardstock available from office supply stores.
www.paperwishes.com is my favorite paper craft supplier. I get NO remuneration for mentioning them. I just want to make you aware of them because they have great sales that run for 2 weeks at a time. The pink plaid paper, the little keys, the stamp set and the Pebbles Inc. chalk were all purchased from them. They have a VIP program for customers who spend $500 or more over time, not necessarily all at once. When you reach VIP status you get bumped to the top of the order fulfillment list and get your items very quickly. You also receive free items occasionally. If you give them a try, I hope you love them as much as I do.
Have a "Scrappy Day,"
Effie


Cute card! I am sure the kids will love it!
ReplyDelete